10 Pro Tips for Good Product Photography
10 Pro Tips for Good Product Photography
Product Photography is used to capture and render the visual image of an item on sale. It is the first visual introduction of a product to the consumer. E-commerce allows for immersive shopping experiences, and that makes good product photography paramount for good sales and customer loyalty.
A professional photographer uses a number of techniques to snap product pictures, some very complex, others very expensive.
But you don’t need a professional photographer to beautifully portray your products.
Many factors play into good product photography, no detail is too small: lighting, angle, depth of field, focus, background, and composition; to name just a few. When all these elements are balanced, they help create a seamless shopping experience.
Customers may not be able to touch your products, but good product photography should be detailed and true, so it can increase trust and ultimately convince a prospect into buying.
To help you do that, we’ve curated 10 Free Pro Tips for Good Product Photography.
WHY IS GOOD PRODUCT PHOTOGRAPHY IMPORTANT?
According to BigCommerce, the human brain can process images in only 13 milliseconds — which means you don’t have much time to make a good first impression on your customers.
What shoppers see, visuals, are often a deciding factor in whether they will stay on your site or lose interest. Investing time and resources to better show off your products will surely pay off by increasing sales.
One of the best ways to do this is through great product photography.
Here are 5 reasons how good product photography impacts online sales:
Google likes original content. By optimizing your images, you may get much closer to the top positions in Google images search. The Intent Lab states:
– 85%+ of the respondents, while shopping for clothing, value visuals as more important than texts.
– 36% of respondents use visual search.
– 59% agreed, that visual information is more important than contextual.
If a client spends lingers on product images, the “time on page” parameter goes up, signaling just how engaging your resource is.
The more accurate your imagery reflects your products – the less your return rate is.
The more context you attach to imagery, providing shots in context – the higher the probability the target audience will resonate with the product and buy it.
In a nutshell – poor product photography is a commodity no store owner can afford.
1. Product Presentation
Make sure to prepare your product so it looks perfect. Yes, perfect may sound impossible, but no detail is too small here. Steam or iron clothes, clean stains, fold items neatly, pay attention to symmetry, and use props.
Good product photography is accurate and true to the product. Take time to display your pieces neatly. Show off the beauty, colors, texture, and size of your products accurately.
Think about how those products are usually displayed in stores. Look for inspiration and ideas on Pinterest, Instagram and Google Images.
2. Set up a Background
The backdrop or background behind a product photo is as important as the product itself. Surfaces should be clean and simple. This way, the background complements the products without distracting users away from it. A good background can be solid white, black, beige, gray, textured or with soft patterns.
There are plenty of backdrops available online. They are a professional tool for good product photography that will make taking pictures of products easier. A good background will also save you time editing pictures and will give a consistent look to your products.
You can create your own backdrop for photography using brick walls, wood, bed sheets, decorating paper, tablecloth, curtains, or a table.
Use pins and nails on walls to hang pieces, or install shelves to display your products. Steam or iron bed sheets, curtains or tablecloths so they look neat and clean.
Keep the background at a distance where the product does not create excessive shadows. Move it closer or farther away depending on the size of the product and light.
3. Use a Good Camera
Thankfully, good cameras are not as expensive as you’d think. Today, hi-resolution cameras are accessible everywhere. You may be holding one right now.
Many modern cellphones carry are blessed with amazing cameras. iPhones feature some of the best cameras for mobile devices. Their latest model, the XR, has a 12-megapixel camera that can even record in 4K. But, mobile camera quality varies by model. A cheap Android phone such as the Alcatel Raven only has a 5-megapixel camera that produces grainy pictures.
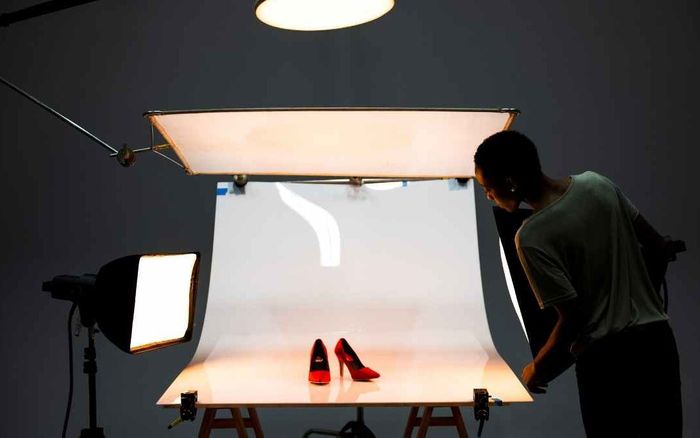
4. Find Good Natural Lighting
If you can afford photography lights like a strobe or umbrella.
The three types of lights for indoor photography are key light, fill light, and backlight. Look for light coming through windows and doors. Snap pictures during the day when it is bright out. Raise blinds, open doors, and windows to allow more natural light to flood in and illuminate your subject. By doing this, you may never have to use artificial light.
Regarding the equipment, there are three major types of continuous lighting bulbs: fluorescent, tungsten & LED. All types generate great results. Fluorescent is generally easier to find in studio lighting and does not overheat, so that is what most studio photographers use. LED is a safer option to tungsten because they tend to not overheat as much.
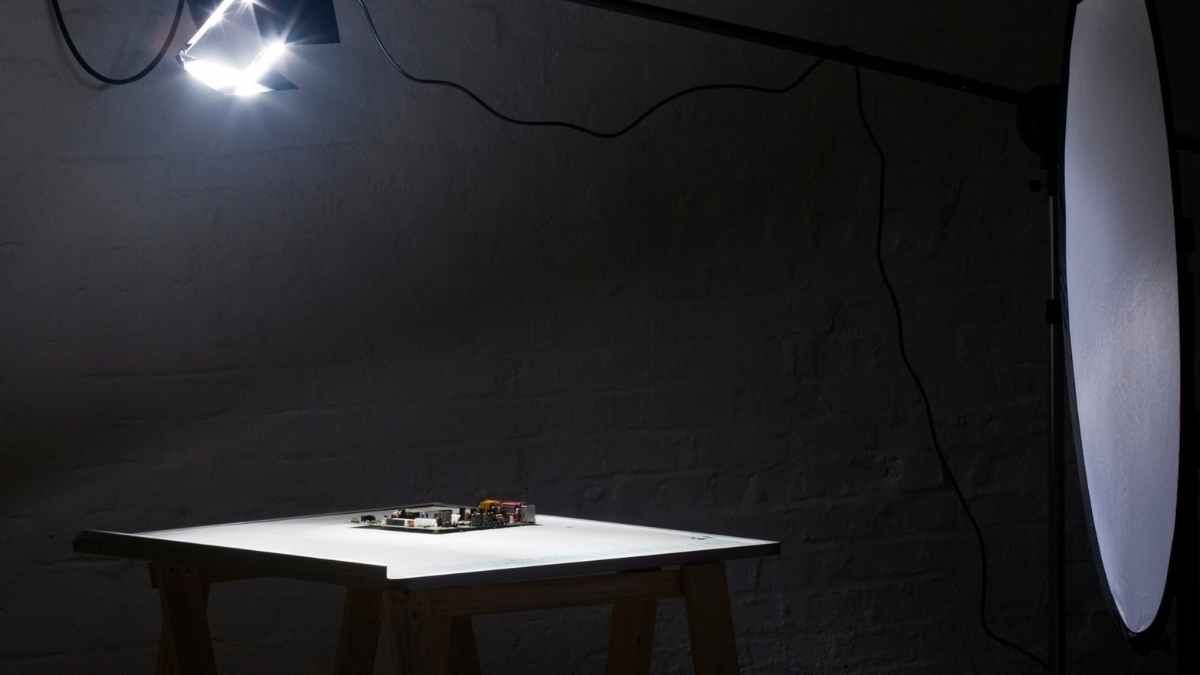
5. Get a Tripod
Stabilizing your camera is as important as the resolution. Especially when using natural light, it is important to keep the camera still in order to prevent blurred and out-of-focus pictures.
Tripods are cheap and easy to find. Sometimes they are available in stores like Marshalls and Walmart, but you can also buy one online. Make sure the tripod fits the camera or phone and is stable. Check reviews and invest in this great tool for good product photography.
6. Use Props
Props are decorating objects added to the background or interacting with the subject/product. They help display a product in its environment and add life to your shots.
Good props can be almost anything, from cute coffee mugs, small art with quotes, sunglasses, nail polish, flowers, and wooden boxes to plants.

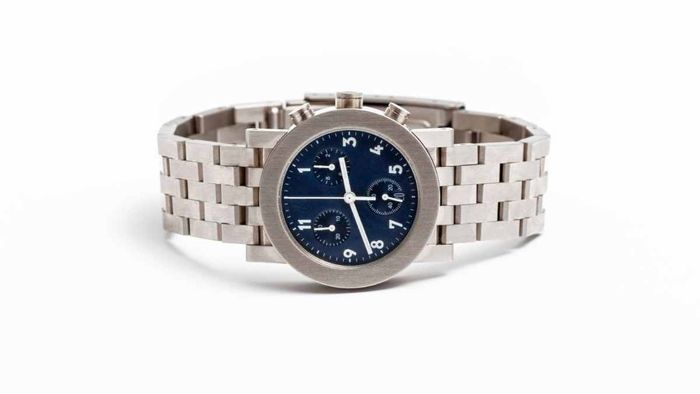
7. Take Multiple Shots
Position the camera and the product so you can take pictures from multiple angles. You should always include pictures of the front, back, side, 45 degrees, and any details.
Zoom into product aspects that make it unique and attractive. This adds value to your products by showcasing many product pictures. The more, the merrier. Consumers to see as many product details as possible before buying. This is where you give them what they want, so they click on “buy now”.
8. Add Human Element – Lifestyle Photos
Show off your products as they are consumed. Display your products being held or touched. This adds a lifestyle/blog feel to your product photos, making them interesting and making it easy for users to imagine themselves using your product.
Ask friends and family to model for you. Or set the camera timer and do it yourself! Make sure hands are clean if zooming in and pedis done for shoes.

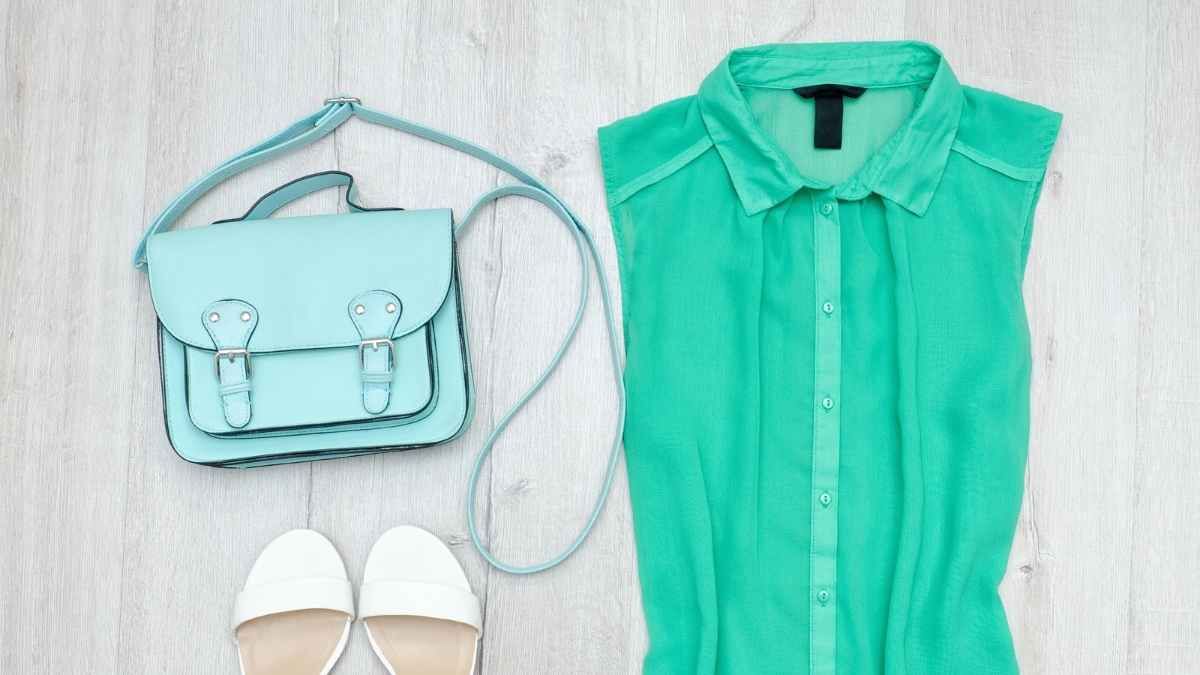
9. Display your Products as Flat Lays
A flat lay is a photo taken directly from above – a bird’s eye view of a variety of carefully arranged objects. It’s become very popular, particularly in food and fashion photography.
Lay your products flat on a surface and take the picture from above, displaying a full view of the subject. Make the products look as close as they would look in real life. If it’s a skirt, add volume and folds to visually represent the silhouette. Make sure glasses are photographed facing up.
Play with the versatility of your products. Make folds, add flare, shine accessories, clean glasses, add props, roll sleeves, and hide seams.
10. Edit your photos
Use Photo Editing App or Software. There are free mobile apps and software to help edit your photos, this is the final step in making sure your product’s photography looks professional and attractive.
Canva is a great free tool, but there are more professional tools out there like Photoshop, Lightrooom, Pixlr, Instagram, Pexels, VSCO, and more.
Edit brightness, and contrast. Play with the intensity of shadows, highlights, and white balance. Make sure your pictures look clean, your whites sharp and your details visible.
Optimize file size, format, and dimensions. Make sure the final version does not exceed 100KB.
Add alt text with keywords to every photo and title, so search engines like Google find and show your content.
Follow these 10 pro tips for good product photography that improves sales, trust, look, and the average time a user spends on your product page.